Introduction
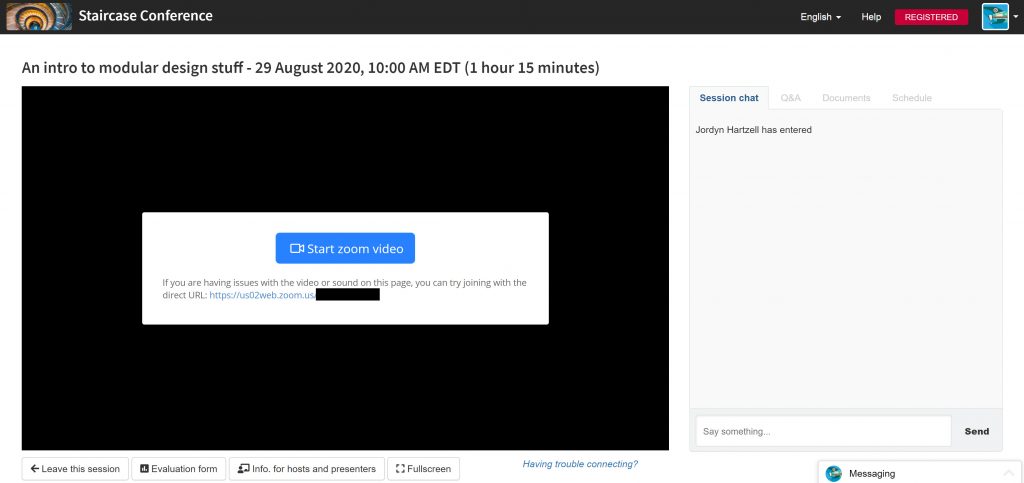
You can turn any session into a virtual session by configuring the virtual space setup. This tab provides configuration options to enable the virtual space and live session features. Once you have a virtual space enabled for a session, you can configure how your attendees will access the video stream. For all virtual space video providers, attendees can access an external link to your video stream from the live session page. For certain video providers, you can configure the virtual space to embed the video stream directly on the live session page.
Live Session Page
The live session page is the home of your session’s virtual space. This page is accessed by the Join virtual session button on the session’s detail page. The join button will be accessible approximately 30 minutes before the session start time and 30 minutes after the session end time. The join button will display indefinitely under the following conditions:
- the session is unscheduled, i.e., there is no start or end date time for the session
- the session is archived, i.e., a virtual space recording or transcript url is present for the session
Embedded Video
For valid virtual space provider types, you have the option to enable embedded video. This provides a seamless experience for your attendees with video and user engagement features (chat, Q&A) on the same live session page. You can still benefit from user engagement features with non-embedded video, but the user will be linked externally to the video stream.
To enable embedded video on the live session page, choose a valid provider type in a session’s virtual space form and switch the Embedded toggle on. The video providers that are embeddable through Grenadine are: Grenadine Jitsi, Youtube Live, Vimeo, and Zoom.
Virtual Space Provider Setup
Once you have chosen a provider that best fits your needs, you can configure a video stream for your attendees to view. Depending on which provider you choose, you may need to perform additional setup outside of the Grenadine system.
Grenadine Jitsi
Grenadine Jitsi provides a quick, simple way to create virtual spaces for your sessions without the need of external user credentials or setup. When configuring your virtual space, select the Grenadine Jitsi provider type and the Virtual space URL field will populate with your unique Jitsi room link.
The video stream will display directly on the live session page if you have enabled embedded video; otherwise, the live session page will display a link to your Jitsi room.
Youtube & Vimeo
You can set up an external video stream through Youtube Live or Vimeo and provide access to the stream through Grenadine. In the virtual space tab, choose either Youtube Live or Vimeo as the provider type and input the link to your stream in the Virtual space URL field.
The external stream will display directly on the live session page if you have enabled embedded video; otherwise, the live session page will display a link to your external stream. Please visit the respective provider’s site to learn more about live streaming through Youtube Live and Vimeo.
Zoom
You can conveniently create Zoom meetings through the Zoom API directly from the event manager! To create a Zoom meeting, you will need an existing Zoom account and credentials from Zoom for the API.
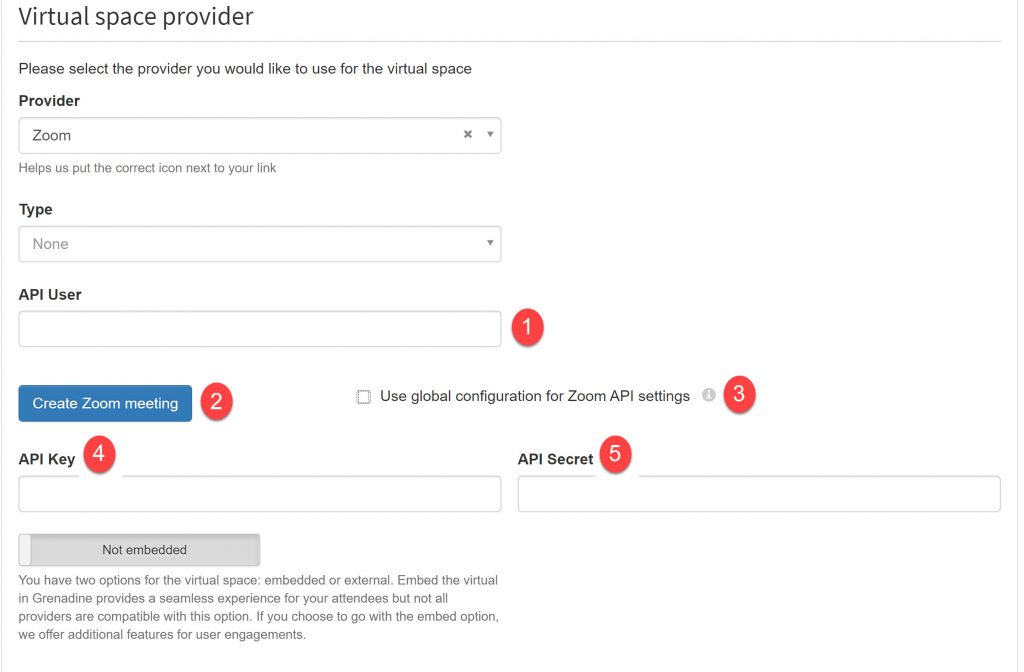
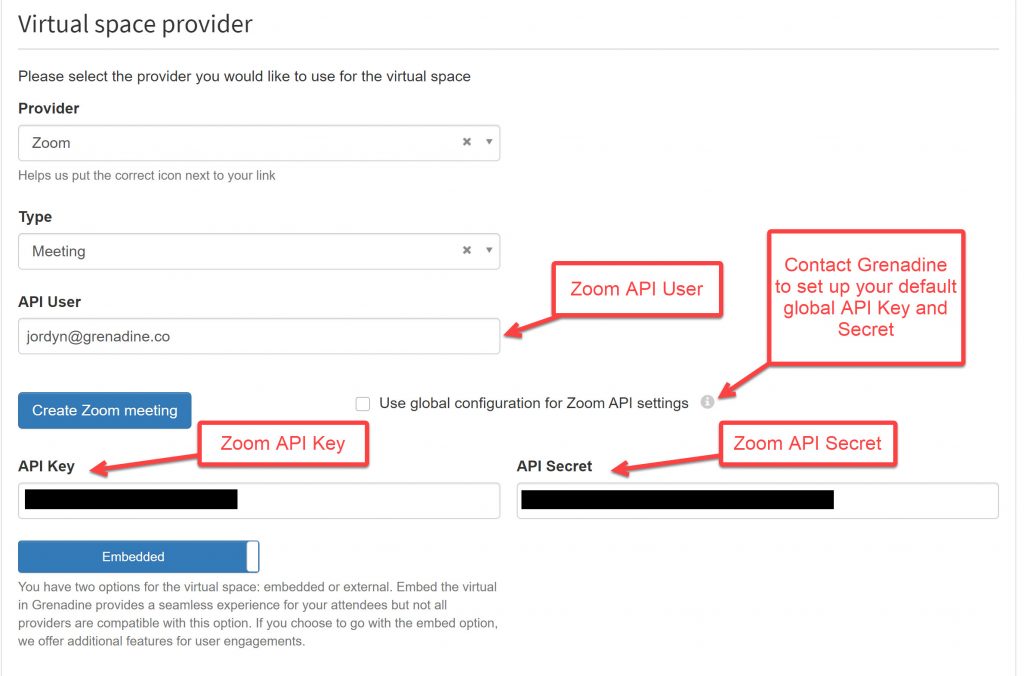
- The email of the Zoom user associated with the Zoom API credentials.
- The button to create a Zoom meeting given valid Zoom API credentials.
- The checkbox to default to the global Zoom API credentials if provided. Do not select this unless you have contacted Grenadine and have confirmation that your Zoom API credentials are set up globally.
- The API key from Zoom.
- The API secret from Zoom.
Creating a Zoom API meeting through Grenadine
You will need a Zoom user, Zoom API key, and Zoom API secret to create your own Zoom meetings via the Grenadine event manager. After retrieving your Zoom credentials, you can contact Grenadine to set up your unique Zoom API key and secret globally across your events.
- Go to Zoom App Marketplace (https://marketplace.zoom.us/develop/create) and sign in or create an account if you do not have a Zoom account. Once you are signed in, select the
JWTapp type.
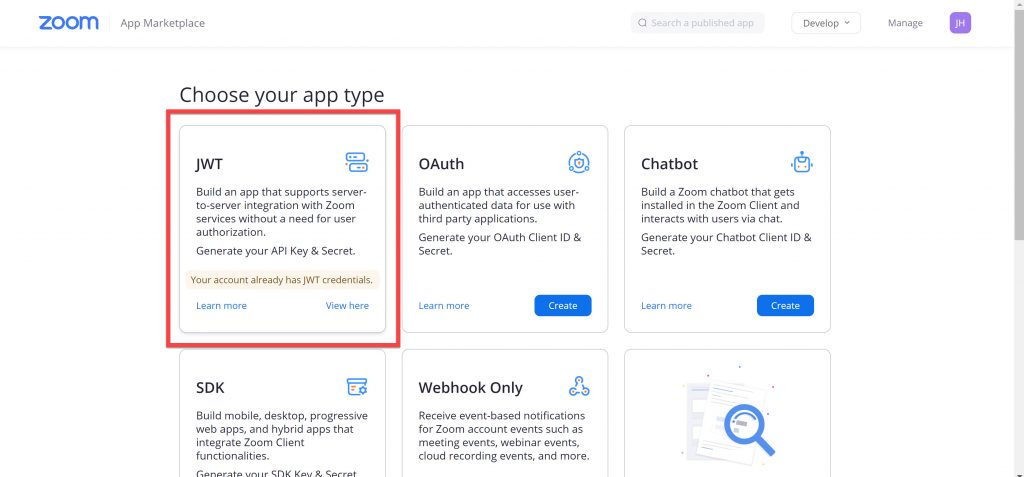
- Fill in the information that is requested to create your JWT app. Note that the app name can be anything as it is for your own reference. When you’ve successfully created your JWT app, you will be assigned a unique Zoom API key and secret and you are ready to start creating Zoom meetings via Grenadine.
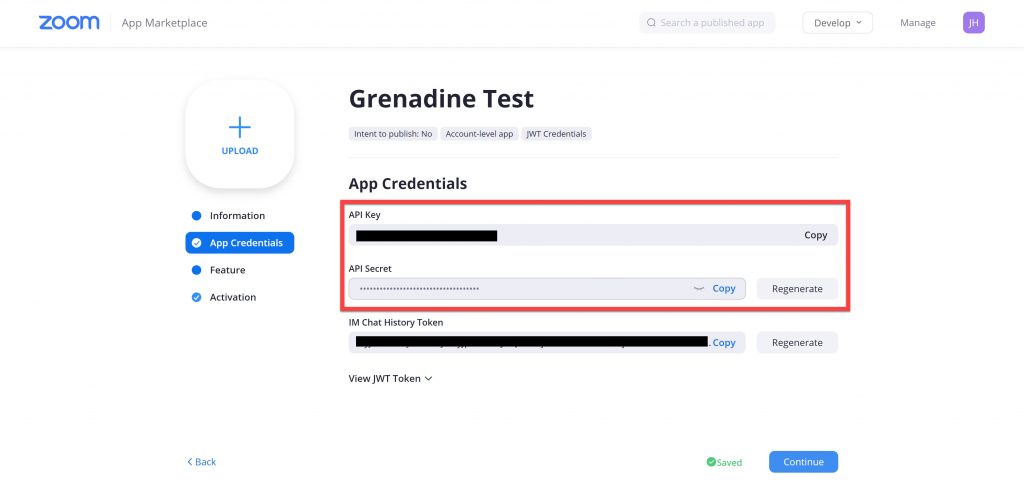
- Select the
Zoomprovider in the virtual space tab. If you have not requested to set your global Zoom values through Grenadine, ensure that the checkbox toUse global configuration for Zoom API settingsis not checked. Input your Zoom API user (the email of the Zoom user), API key, and API secret in the virtual space tab of a session. You can request to set up the global Zoom configuration values through Grenadine to use the same Zoom credentials across your events.
- Once you have successfully input all Zoom credentials, click the Create Zoom meeting button. A Zoom meeting will be created and the following virtual space form fields will be populated by your Zoom room details: Virtual space URL, Host start URL, Meeting ID, and Attendee password.
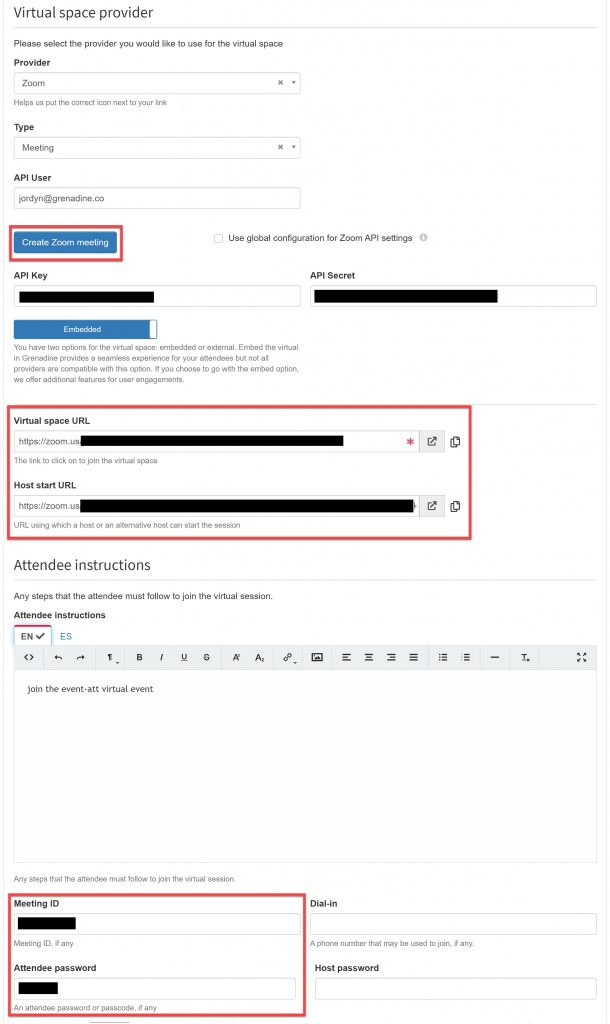
- Depending on whether you have selected the embedded video option for the virtual space, attendees will have access to the Zoom meeting directly from the live session page or a link to the Zoom meeting on the live session page.
